Open topic with navigation
Creating Custom Fields
Custom fields are used when people are searching for a group to join from the Groups web application (InFellowship). See Custom Fields for details and case study examples.
To create custom fields:
- Click Groups > Administration > Custom Fields. The Custom Fields list appears.
- Click Add. The Create a new custom field workflow appears.
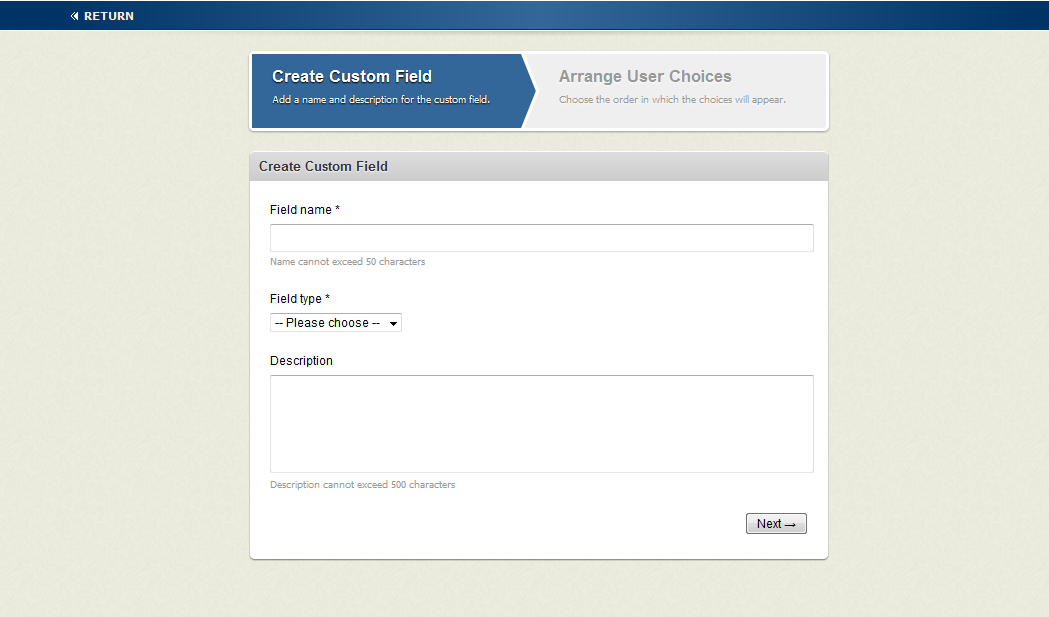
- On the Create Custom Fields tab, type the label for the custom field in the Field Name text box. This option appears when a group is created and allows the group creator to select the appropriate option.
- Select one of the following from the Field type drop-down list:
- Multi Select Option—allows group leaders to select more than one option to apply to the group for search purposes.
- Single Select Option—allows group leaders to select only one option to apply to the group for search purposes.
 Create Custom Fields

- Optionally, type a description in the Field description text box. The description appears along with the field label when a group is created. It could be a sentence describing what is required for this custom field.
- Click Next to move to the Arrange User Choices tab.
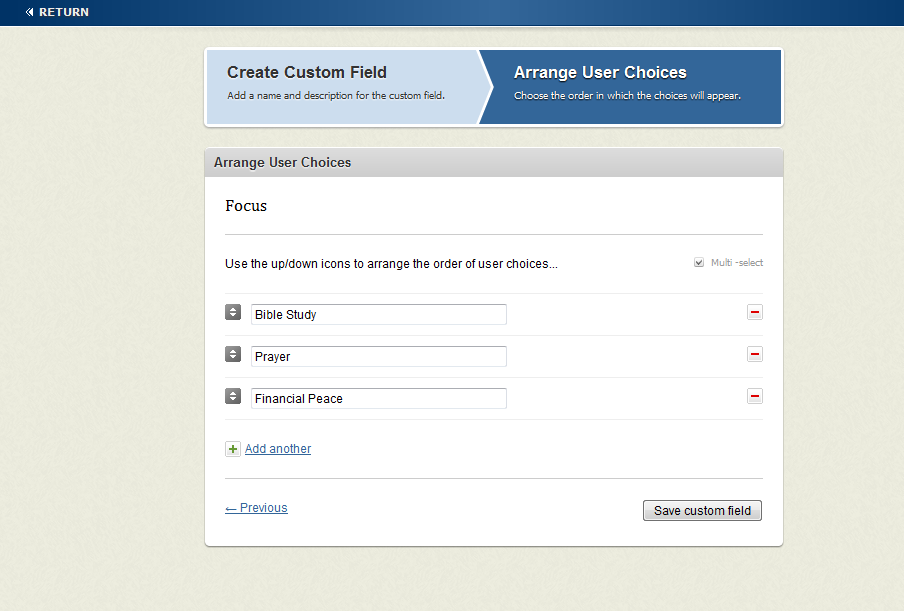
 Arrange User Choices

- Type option names in the available fields for user choices.
- Optionally, you can use the up and down arrow image beside one of your options to rearrange its order in the list. Simply click and drag up or down.
- Click the Add another link if you need extra option boxes.
- Click Save custom field.
Next, you must apply the custom field to the group types that will use the field and then you will create a search category so people can find groups by these custom field selections.